Showing posts with label quilting. Show all posts

Monday, October 24, 2011

School holidays

School holidays are over. What have I achieved? I cleaned my house, got sick (nasty virussy thing), made this cot quilt.

I also managed to go to a quilting class with Rosemary Rush. I had to leave early and I didn't really take advantage of the learning opportunities (that's teacher-speak for 'is lazy and didn't work') but it turned out it was a 5 day virussy thing and I thought I was better but I wasn't. I hope I wasn't contagious.

Angie Simmons made a video montage of her photos from Rosemary's class. You can see it here.

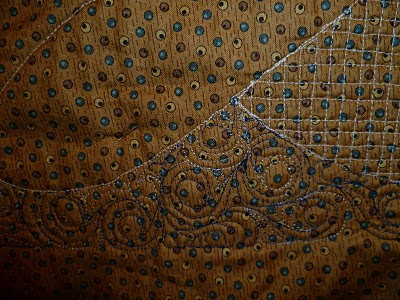
I tried out a quilting pattern of Rosemary's on the cot quilt. I hope you can see it. It's a spiral with a ring of spiky triangles and it fills the space quite quickly. There are a few leaves and simple teardrop flowers in there too. This quilt only took an hour to quilt, and that includes having to refill the bobbin. I'm hoping this will inspire a few more people in our guild to give free motion quilting a go and make some cot quilts for the neonatal unit.
Just in case you were worrying, I'm going to give this a good wash before donating it to a sick baby!

Thursday, September 29, 2011

Celebrate Onehunga - Pukeko take 2

So, I'm running out of time to get this finished! I changed my plan and had to redo this panel so that it fits. I decided to make it slightly less pink and also you can see a bit of Cabbage tree has crept into this block too!

Melanie asked me what I meant by "blocking". Blocking is stretching out a piece of quilting or embroidery to make it lie flat. I dampen my wallhangings by pressing them with a very damp tea towel. I don't press hard with the iron, just enough to get the steam into the quilt. Then I pin the quilt to a bit of ceiling board with very sharp pins, smoothing the quilt as I go, and leave it to dry.  That makes them nice and flat.

Here is the detail on the bird.

Thursday, September 8, 2011

Celebrate Onehunga - mosaic table and chair

I've been having fun making new quilting patterns. Probably not new to the world but new to me!


I love the back!


Three panels done! Only six more to go...

Sunday, August 28, 2011

Celebrate Onehunga

I'm just so excited about my next project! I was going to wait until I finished some bits of it but I'm just too excited and I have to let you see what I've been up to.

First, the inspiration for this quilt comes from some prints my Mum has by Kate Spencer. Kate lives in St Kitts in the Caribbean, which is where my parents used to live and my sister is still there. This is one of the paintings and I have wanted to turn it into a quilt ever since I first saw it (in 2004 I think!).

Sometimes it just takes time for an idea to fully develop. I thought about making it a New Zealand quilt. Then I started to think about images I could use and the idea developed into an Onehunga quilt. There are so many cool things right on my doorstep! The old Post Office, Carnegie's library, the old Onehunga Primary School, the Tongan church and so many cute little houses.  How about these images, the mosiac table and chair on Onehunga Mall and the fountain in Jellicoe Park. These are things I love about living here.


Then I also have Cornwall Park just up the road from me. Melanie took this photo of a Cabbage tree in Cornwall park when she was putting together her installation for her final year of her Fine Arts Degree.

I think she did a painting of it. Look what I did with it!


Of course you can see One Tree Hill from Onehunga so I had to paint that too, as it is just now without the tree!


I'm really enjoying making this quilt! Just as well because this one is going to be nine panels, about 2m by 2m or perhaps a bit smaller by the time I make the wonky lines. So I suppose it's going to be 6 foot square. Oh, and I think I'm going to make three of them. I've got so many ideas for panels that they won't fit in one quilt. So what am I going to do with twelve square metres (over 100 square feet) of wallhanging?

Thursday, July 28, 2011

Transformation challenge part 3

I've fussed about trying to get this design as uniform and symmetrical as I could. Let's just pretend I meant to make it more organic!


I drew the design on to freezer paper and ironed it the quilt back. Then I free-motion quilted on the lines, trying to fix up mistakes as I went.

This is the front of the quilt. Now I have to try to remove all the freezer paper, ready to quilt in the spaces. I also have a little bit of unpicking to do!

Saturday, June 25, 2011

Quilting a community quilt


This quilt is going to be given to a charity through the guild. I wanted to practise my quilting now that I have a Supreme Slider and I don't often make bed quilts so I volunteered to quilt this quilt. It's a good 'boy' quilt so I don't want to do anything feminine on it. Ferns seemed like a good idea. Maybe I'll regret that after I've done a few! I'm going to put ferns on all the dark blue bits so that the stars stand out but I'm going to have to quilt the stars too. Any ideas? All I can think of is a flower in the middle but that's too girly.

Friday, June 3, 2011

Transformation challenge part 2

My second experiment:
I tried a different fabric. That white fabric feels like a poly/cotton but it isn't. A softer cotton is easier to quilt.
The hearts were an experiment with the bobbin and feed dogs. The first group is feed dogs up and bobbin thread just through the tension clip in the bobbin case. The second group is feed dogs down. Then for the next group I threaded the bobbin thread through the eye in the bobbin case as well as the tension thingy.  Bernina machines (and some others) have an eye on the bobbin case. The first six hearts are done with the feed dogs down and then I put them back up. I think the quilting is smoother on the third group.


This is another idea that I was exploring. It's an untied celtic knot!


And this is just a doodle - but it was fun to do it.

Thursday, June 2, 2011

Transformation contest - part 1

I've had a really boring week making new cushions for my couch. I made the first one too tight and had to remake it. So now I don't have enough fabric. On top of that, when I worked out how much fabric I needed, I didn't take the pattern of the fabric into account and it is directional (nap, as seamstresses would say) and so I've had to cut out the cushion covers with a lot of wastage. I hate taking up hems, mending zips and making functional items. I would much rather be sewing little scraps of fabric together!

So, after finishing just one cushion, here's my reward. I've been working on an entry for a contest.

The theme is 'Transformation'. Of course, being a maths teacher, that means geometry to me. Reflection, rotation and translation. When I teach transformations, I always do a lesson where I get the students to draw kowhaiwhai designs and identify the transformations that they have used, perhaps last period on Friday or some time when I don't want to think. They always enjoy it and I get a break! I do love the designs though. In fact, kowhaiwhai designs have been my inspiration for a previous quilt.  See this post on the design of Koru Gecko.

Scribbles in my sketchbook


The size of the contest quilt is only 9 by 12 inches. I thought that the small format made it difficult to make a design out of fabric, even using the method I've used for my recent quilts. The focus has to be on the quilting so I decided that quilting would be the only colour in this quilt. I needed to see how quilting would fit into small spaces so this sketch is full size.


The quilting designs look cool in pencil. Can I do the same thing in thread?

Ok, so some of it needs a bit of work but I think the idea is coming together.

I was testing a couple of things in this sample. Firstly, how densely does it have to be quilted for the colour to look good. Answer, at least a bit more tightly than the white of the design.  Looking at the top black bit, there is one section where I made the strands a little further apart, just to try to fill the space a bit quicker. I think there is too much white showing and it is competing with the design.  The quilting has to be as dense as the pebbles otherwise the white design doesn't pop out. The red coffee beans work because although the coffee beans are big, the white space is broken up with the wiggly line through the coffee bean.

The second thing I wanted to test was a good way to stay in the lines.  Now, it didn't help that I just drew this design freehand with an erasable marker that is just about dead! My first idea was to quilt the lines with a wash-away thread and then quilt with colour up to the lines. I did the red border first.  As you can see, I went over the lines and my design was eaten up by the quilting. Then I tried just marking the line with pen and quilting up to it. A felt pen mark is about 2mm thick and not precise enough for such a small scale quilt.  Also, sometimes I forgot to fill in the line so my white design is bleeding out into the quilted space. Then I did the black border and decide to simplify the design at the same time.  A bit better result. The last part was the main design in black.  This time I went around my felt pen mark carefully with one line of black thread first.  I think that's the way to go. I found it easier to keep the quilting in the space.

So now I need to draw my design properly and think about how to get it on to the fabric. The other problem I foresee is that the finished piece has to be exactly 9"x12" and I have no idea how much the quilting is going to draw it in. I should have measured my sample before I started.  Look at all the lovely maths that would involve!

Tuesday, May 10, 2011

Teal Dragonfly

Yes, I know, the dragonfly is cream/beige/brown but I've been calling this the teal dragonfly all the way through making it so the name has stuck. I love this quilt and I'm keeping it!!

I've used three different techniques for the curves seams. The middle part is my baste and topstitch method. The circle blocks on the outer border were done using the method I described in this post, making great circles. Then the circle blocks were cut with a gentle curve by stacking one strip of blocks on top of another and just going for it with the rotary cutter.  As long as the curve is not too curvy, the two bits will go back together with a 3-5mm seam.
Metallic thread was couched on to the body.  The thread has slubs (lumpy bits) so it wouldn't go through a needle.
I've done quite a few dragonfly wings now so it's getting easier to do. If you look at real dragonfly wings, you'll see that the small veins between the main veins are more like pentagons than squares.  They are quite easy to quilt too.  Also, dragonflies have a solid bit on the front tip of the wing.  Adding that little bit of satin stitch makes all the difference.
I bought the binding fabric for another project but discovered it was perfect for this quilt! I think my brain is just fixated on this beautiful dark teal colour.

Here are all the posts about this quilt:


Monday, April 25, 2011

Sneak peek at the gecko quilting

I really wanted to finish the gecko this morning. We had torrential rain last night and woke up to a really miserable day, just right for staying indoors and quilting. Right? Wrong! Everything is so damp that the quilt won't glide under the presser foot. After a few botched lines I decided to put my quilt on the towel rail and put the dehumidifier on - and go out shoppping.

So here is a sneak peek at what I've been up to.

I've only quilted a little bit on the blue patterned fabric, just around the shapes.  It's so pretty and I didn't want to cover up any of the design.

I've added three borders to this quilt.  The red one is only 5mm wide.  I thought I could just stitch-in-the-ditch around the outside of the cream and the red but it wasn't sitting nicely so I quilted the cream border.

Taking a macro photo is the only way to see what I quilted! Ho hum, another piece of quilting that will never be seen. Just like the quilting I did on Becky's dragonfly. I really liked the blue jagged triangle thing I did on the blue border but you can't see it from the front. It filled that irregular border so well. Here is the back of Becky's dragonfly so that you can appreciate the quilting.

Tuesday, April 19, 2011

Gecko scales


This is what I'm thinking of doing on the gecko. I was reading a book about maths in nature, 'What shape is a snowflake' (I was in the library doing silent reading with a year 9 class so I was modelling good library behaviour!) Anyway, it must have been meant to be because I was struggling to come up with a way to quilt the gecko and what do you know, the answer was in this book! They have hexagonal scales, as do snakes and other lizards.

I will try to do my quilting a little bit neater on the quilt but I quite like the irregular shapes in my sample. I also wanted to experiment with making the scales different sizes and I think that worked quite well.  I started with the line down the spine and as long as the first hexagon is the right size, keeping the rest in the same proportion was fairly easy.  I want to have them large on the top of the head, smaller as they go through the neck and then larger again in the body gradually getting smaller as they go into the tail.  As I get close to the edge of the body and down the legs, I'll change the hexagons into circles to make it easier to quilt.

The head in my sample is about the same width (but shorter) than in the quilt.  I've got it on my metric cutting board so that is a 1cm grid.  I think the size will work on the quilt.  I'm almost too frightened to quilt it!  I love it so far and I don't want to muck it up!!  Should I go for it?

Sunday, April 17, 2011

All You Need is Love

I made this quilt last year for my nephew. He likes the Beatles. Actually I think he likes Drum Hero and happens to play The Beatles on it but he did like this quilt.

When I saw the fabric with 'All You Need is Love' in rainbow fabrics, I couldn't resist. I used it to make three dimensional bow-ties, teamed with coordinating fabric.
I quilted Beatles song titles in the red border - and discovered that my lousy handwriting is just as bad when I quilt! Still, it is was a fun thing to do.

Even the binding has little pictures of the Fab Four.

I've started a new project. I'm going to try to document all the quilting designs I use in my quilts. So I have started a new page and I'll link each design back to the post where it was used. Hopefully I won't go around in circles!

My first sample is the quilting design I used in the background of the bow-ties on this quilt.  It was inspired by the grey design in the background of one of the fabrics.  It's like a monochromatic psychedelic design, which sounds like an oxymoron but have a look at the design around Paul in the photo above.  How else would you describe it?

Here is my design.  I'm calling it 'Psychedelic'. It's made up of loops that turn into flower petals, groovy wavy lines and the occasional rainbow to fill in some spots.


I've also made a sample of the design I used in the grassy background of my Japanese Lady. I did a little experiment here and added some grass seed heads to a couple of rows of grass tufts.

Thursday, February 17, 2011

Variation on hearts

I've been looking for an opportunity to try out this variation on my favourite quilting pattern, meandering hearts. I came up with this during one very boring exam supervision last year. Isn't it just so cute! I had to make up for the nasty centipedes with something cute.

This little bit took me about 30 minutes. If I don't get any faster at this, it's going to take 20 hours just to quilt the last border. I'd better get faster!

Monday, February 14, 2011

Centipedes in my sashing


Leah Day calls this quilting design Trilobite. I think it looks more like a centipede, those really nasty ones you get in St Kitts, Scolopendra Gigantea.

Would you believe when I was looking for an image of this centipede I found out that people keep them as pets! I had one crawl across my foot once and even the little bit of venom on it's feet was enough to bring out a reaction on my skin. Why would you want to keep one?? But doesn't it look lovely as a quilting pattern in my sashing.

Updated to remove image. I just read a scary blog post about getting sued for breaching copyright. Since I can't remember where I got the image and it is highly likely that it wasn't from the original, I decided I'd be better off deleting it. Take it from me, it was a nasty big centipede and you can google it yourself if you're interested!

Thursday, January 20, 2011

Pebbles and swirls

I've quilted a bit more of the dragonfly quilt. My first attempt at pebbles...
 

And this is based on a design I saw on Leah Day's blog, Poseidon's Eye. I wanted something that looked like eddies in the air from the dragonfly's wings.
 

You can maybe see the pattern a little better on the back. There is a definite circle theme in this quilt.
 

Wednesday, January 19, 2011

For Melanie

My poor Mel is not feeling well and she is a long way from home so I can't give her a hug - so I'm showing her my quilting instead.
 

And the back. How do you like the backing fabric? I thought the circles were a nice touch. Maybe I should do a whole cloth quilt one day. I love the back of quilts.

And a note for Melanie, a casual email from your hospital bed is not going to stop me worrying. Worrying is my job! I'm sure all the mums out there would agree with me. Get well soon pet.