Monday, April 25, 2011

Sneak peek at the gecko quilting

I really wanted to finish the gecko this morning. We had torrential rain last night and woke up to a really miserable day, just right for staying indoors and quilting. Right? Wrong! Everything is so damp that the quilt won't glide under the presser foot. After a few botched lines I decided to put my quilt on the towel rail and put the dehumidifier on - and go out shoppping.

So here is a sneak peek at what I've been up to.

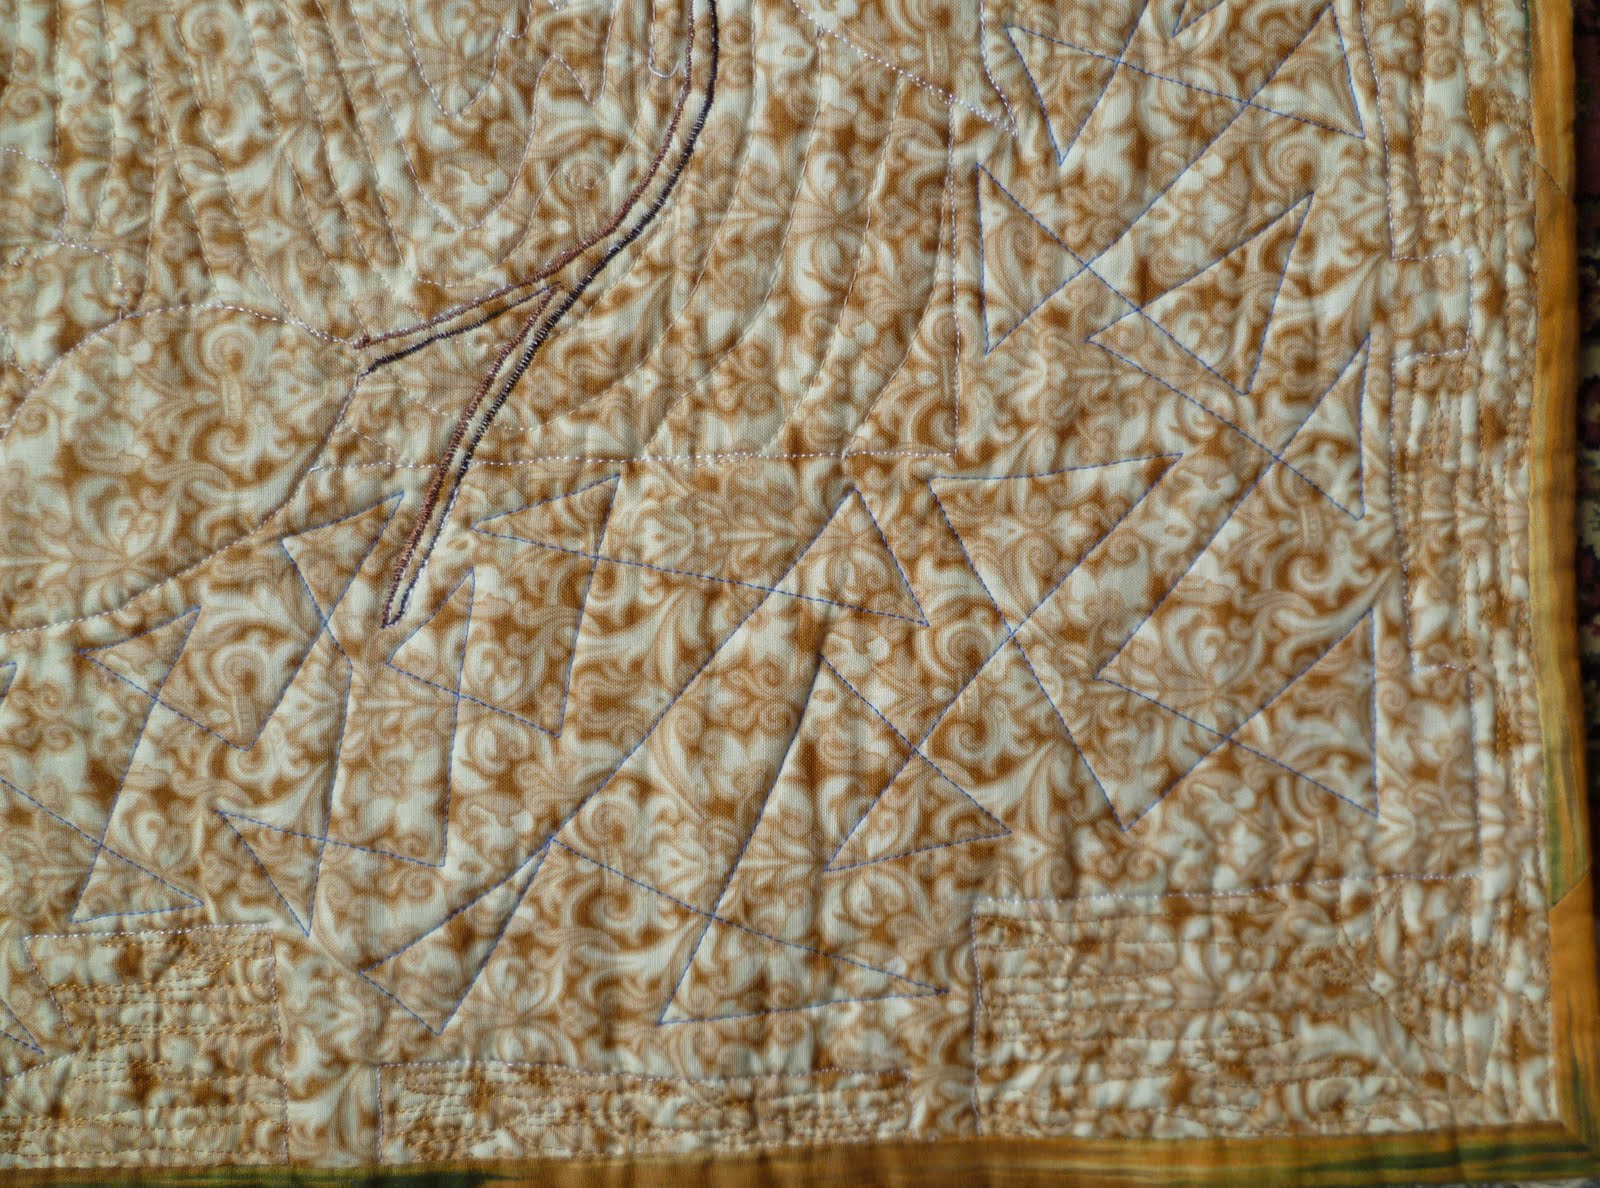
I've only quilted a little bit on the blue patterned fabric, just around the shapes.  It's so pretty and I didn't want to cover up any of the design.

I've added three borders to this quilt.  The red one is only 5mm wide.  I thought I could just stitch-in-the-ditch around the outside of the cream and the red but it wasn't sitting nicely so I quilted the cream border.

Taking a macro photo is the only way to see what I quilted! Ho hum, another piece of quilting that will never be seen. Just like the quilting I did on Becky's dragonfly. I really liked the blue jagged triangle thing I did on the blue border but you can't see it from the front. It filled that irregular border so well. Here is the back of Becky's dragonfly so that you can appreciate the quilting.

Tuesday, April 19, 2011

Gecko scales


This is what I'm thinking of doing on the gecko. I was reading a book about maths in nature, 'What shape is a snowflake' (I was in the library doing silent reading with a year 9 class so I was modelling good library behaviour!) Anyway, it must have been meant to be because I was struggling to come up with a way to quilt the gecko and what do you know, the answer was in this book! They have hexagonal scales, as do snakes and other lizards.

I will try to do my quilting a little bit neater on the quilt but I quite like the irregular shapes in my sample. I also wanted to experiment with making the scales different sizes and I think that worked quite well.  I started with the line down the spine and as long as the first hexagon is the right size, keeping the rest in the same proportion was fairly easy.  I want to have them large on the top of the head, smaller as they go through the neck and then larger again in the body gradually getting smaller as they go into the tail.  As I get close to the edge of the body and down the legs, I'll change the hexagons into circles to make it easier to quilt.

The head in my sample is about the same width (but shorter) than in the quilt.  I've got it on my metric cutting board so that is a 1cm grid.  I think the size will work on the quilt.  I'm almost too frightened to quilt it!  I love it so far and I don't want to muck it up!!  Should I go for it?

Sunday, April 17, 2011

All You Need is Love

I made this quilt last year for my nephew. He likes the Beatles. Actually I think he likes Drum Hero and happens to play The Beatles on it but he did like this quilt.

When I saw the fabric with 'All You Need is Love' in rainbow fabrics, I couldn't resist. I used it to make three dimensional bow-ties, teamed with coordinating fabric.
I quilted Beatles song titles in the red border - and discovered that my lousy handwriting is just as bad when I quilt! Still, it is was a fun thing to do.

Even the binding has little pictures of the Fab Four.

I've started a new project. I'm going to try to document all the quilting designs I use in my quilts. So I have started a new page and I'll link each design back to the post where it was used. Hopefully I won't go around in circles!

My first sample is the quilting design I used in the background of the bow-ties on this quilt.  It was inspired by the grey design in the background of one of the fabrics.  It's like a monochromatic psychedelic design, which sounds like an oxymoron but have a look at the design around Paul in the photo above.  How else would you describe it?

Here is my design.  I'm calling it 'Psychedelic'. It's made up of loops that turn into flower petals, groovy wavy lines and the occasional rainbow to fill in some spots.


I've also made a sample of the design I used in the grassy background of my Japanese Lady. I did a little experiment here and added some grass seed heads to a couple of rows of grass tufts.

Sunday, April 10, 2011

Hand in date for the quilt show

Yesterday was the hand in date for the Counties Manukau Quilters Guild show and I didn't have either of my wallhangings finished. Fortunately we are meeting on the 30th and the show is on the 14th and 15th May so I have a little bit more time.

I was up to 3am putting the border on the gecko quilt and putting a hanging sleeve on the quilt I made for Melanie. This is the quilt I've used in the background of my blog and I still don't have a proper photo of it. Hopefully I'll get a good one when it's hanging up at the show. It's so difficult to take a good photo of bed quilts unless they are hanging up.

Here is Melanie with her quilt.
 

I machine sew all my quilts but this one is hand sewn. It took about 9 years to complete - not 9 years of solid work but picking up and putting down for long spells. I love it. The best compliment I had for this quilt was, 'I don't like bright quilts but I love this one!"
This was from a friend who does the most beautiful traditional quilts in muted tones, stunning workmanship and lovely colour combinations. High praise indeed!

Sunday, April 3, 2011

Gecko - all pieced


All the piecing is finished. There are quite a few basting lines to remove and then I'm going to add a simple border and try to get it quilted in a week. Make that a night! I still have to finish the quilting on the dragonfly wallhanging and I think hand in time for the quilt show is next weekend. Help!! I'm going to have to ask for an extension - just like being back at uni.

Talking about university, I was at my lecture yesterday and the university are thinking of putting on a new Masters programme. We were given a questionnaire to fill in, basically asking if we would be interested in a 120 credit masters course that we could do now instead of a 120 credit postgrad diploma (that's what I'm doing now) and then the 120 credit masters course. Half the time and half the fees, of course I'm interested! There has to be a drawback and I would guess that it could be more difficult. I like a challenge!

I'm going to try loading this photo again...

Wednesday, March 30, 2011

Hearts are ready for posting


A baker's dozen ready to be sent off to Evie.

Hearts for Christchurch

Edited to put my photo back in. Where are they going??

Sunday, March 27, 2011

More hearts for Christchurch

As promised, some hearts made from the remaining wool.  Here are three of them all stuffed and finished.


This was a bit of an experiment.  I didn't have much dissolving stabiliser so I tried something else.

I started by ironing on some fusible web to the front of the fabric.


Teased out the wool roving to cover the fusible web.


Scattered my threads over the wool.


This is where things went a bit wrong. I thought a layer of bondable Angelina fibre on top would be a good idea. I only have white and thought it would blend into the wool. Wrong! I managed to peel the layer of Angelina and my fancy yarns off the wool and turn it over.


Then I used the backing paper from the fusible web. I put the paper on top of the wool and threads and sewed some lines to hold it all down. I tore the paper off and sewed some lines going across the previous lines.  That was a bit difficult.  The foot kept getting caught in the yarns.


And the finished fabric after washing in hot soapy water.


And this was my second attempt. I used the two small pieces of soluble stabiliser instead. I also put the Angelina fibres under the fancy yarns instead.


Here's a good tip I picked up from Abby Glassenberg. Instead of cutting the felt out with a seam allowance, use a freezer paper template, sew around the freezer paper and then trim back the seam allowance. Abby makes the most amazing soft sculptures. They aren't toys. They're works of art.
I have reused the same bit of freezer paper for six hearts here. I'm not going to turn these hearts out to I have sewn the felt on to the wrong side of the fabric. I cut a little triangle out so that I could place the ribbon for hanging the heart.


After cutting out the heart, I stuffed them...


... and then sewed the hole shut to complete the heart.


This is my second piece. The Angelina fibre didn't go like a white spiderweb this time. You can't really see it in this photo but it went iridescent instead of white. Not sure if that was because it was next to the wool roving this time and bonded with the wool or if I put hotter water on and it washed some of the dye ou of the wool. Anyway, it looks great and I can't wait to make up another set of hearts with pink felt. I've run out of ribbon so they will have to wait. :(