Thursday, November 27, 2014

linoprints without lino

I had a few issues with technology this week so I'm actually staying late at work to do this! Blogging on an iPad is hopeless and my little netbook has finally given up. I think it needs to be put to rest.

How do you do linoprints without lino and sharp instruments? I saw this video by Derwent using foam and Derwent Inktense blocks (and you know I love my Inktense blocks) so I thought I'd give it a go on fabric. The only thing I did differently to the video is that I placed the fabric on the table and turned the foam over and pressed from the back of the foam. It worked well so I shared it with our arty farty group.
Very simple materials list: foam from Spotlight, Inktense blocks, bamboo crochet hooks instead of expensive embossing tools, rubber gloves and the one thing I don't have in this photo is the small spray bottles I picked up at the $2 shop.

I asked the arty farty group to bring white, cream or light coloured fabric. This is what we made.
Ann managed to get quite fine lines with a pencil.We started off just printing one colour.
Then Mel showed us a printmaking technique called a reduction print. Her Peace Lily is to the left. She started by pressing out the outlines and the white bit for the flower and printed yellow. Then she pressed out the yellow stamen and printed light green. The foam only takes so much abuse so rather than try to emboss the leaves, she just painted the background with dark green and then printed it. My attempt at a leaf is on the right!
Helen made this lovely woodgrain using two colours.
This was my reduction print. I did it in three stages. Embossed the main outlines, printed yellow, embossed the centre of the flowers, printed orange, embossed the whole flower and then coloured different sections of the the remaining print to get this effect.


This feather below has been washed. I think I lost a bit of colour. Derwent Inktense is permanent after it dries but you have to wet it on the fabric first. It dries so quickly when you print that I think it isn't reacting to the fabric fully. I'm going to try a spritz of water after printing and drying, then let it dry again to see if I get better colour-fastness.

Sunday, November 23, 2014

Another doll finished

I'm announcing this as if I've been really productive. The truth is that this is the doll I cut out months ago! But he's finished now.

Wednesday, September 10, 2014

Around the World Blog Hop

My good friend, fellow educator and blended e-learning guru, Monika, invited me to join the Around the World Blog Hop. See Monika's blog post here.

This is my first blog hop and I believe I have to answer some questions...

What am I working on?What I should be working on is my quilt for the Festival of Quilts, my Keith quilt, I haven't touched it in weeks and I don't want to rush it. So, sorry, no pictures of that yet.What I have started is another doll - and learning to play the ukulele! The doll is another Abby Glassenberg design, like the girl doll I made at Christmas.


My last finish was this challenge quilt. I never posted a photo with the shells attached so here it is, completely finished.


Our guild had a retreat recently. I made these heart squares in class with Carol from Carols quilts. It was meant to be a scrappy quilt, as in four colours for the hearts. I went a bit overboard and created my own fabric from scraps. I save any squares left over from other projects, bits of binding and anything with a straight edge, and then put them together at random. It works quite well and you feel very righteous for being so frugal!


2. How does my work differ from others in its genre?

I like to work with two main colours, usually opposite on the colour wheel, but lots of shades and prints. I may set myself a rule that I'm going to make, say, a yellow and blue quilt but then see how far off yellow and blue I can go. A lot of pondering goes on at the fabric choice stage. This quilt ended being called Teal Dragonfly, which is strange since the dragonfly is shades of beige and orange. I love those teal to turquoise fabrics.

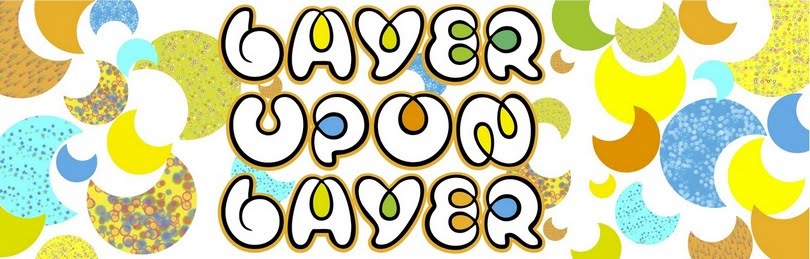
This quilt was inspired by Katie Pasquina Masopust's book, Ghost Layer. Working in a series really helped me come up with this final design. My other ghost layer quilts are here.Layer Upon Layer: ghost layer quilts

The other thing I like to do on quilts is paint them. I'm really drawn to painted quilts, like Annabel Rainbow's Life series. My painting doesn't have quite the sophistication of Annabel's quilts. Annabel doesn't just paint the quilt but also appliqués and even makes the quilts in the painting using English paper piecing. You should check her out of you haven't seen her quilts before. Here is my painted quilt.

3. Why do I write/create what I do?

Short answer is because I would go crazy if I didn't! I have a need to make stuff, even if it's only a nice dinner. I also have a love of fabric and a passion for colour. I have a memory from when I was four years old when my Dad bought a new car. I was playing in the car, as you do at four, and stuck my head under the dashboard, as you do at four. What I saw blew my mind. There were all these beautiful coloured wires. I've been hooked on colour since then and hooked on sewing since I made my first dress at nine.

I made my first quilt, a log cabin, in 1980, when I lived in Washington DC. It was the first time I had seen anything other than a hexagon quilt. I loved the geometry of traditional quilt designs, still do. But I've also tried other hobbies that I then wanted to incorporate into my quilting. I've dabbled in watercolours, silk painting and batik, all things that have made it into my quilts. A lot of my quilts could be classified as art quilts and I find that satisfies the creative need for me.

4. How does my writing/creating process work?

I usually start with a technique I want to try. Sometimes the design takes time to come to me and sometimes something will catch my eye and I know that will work with the technique. I use a sketchbook to try out an idea but the final piece can be different. Sometimes the sketches will be detailed as I try out different shapes, designs or drawings. Other times it's just a scribble to get the proportions right.

I do a lot of design in my head. Only about 10% of my head design makes it on to paper and then only about half of them get made. I love looking back through old sketchbooks or even better, scraps of paper I've put inside books. Sometimes I have no recollection of my thought processes. The design can be totally new to me. It's like a whole new discovery. Maybe I should make some quilts for fundraiser for dementia research. I think I'm going to need it.

Catherine Parkinson is following on from me next Monday. Yes, I know it isn't Monday but we had a total internet failure at the weekend so I couldn't get this out. Ours was a physical problem, unlike the goings on at Spark.

Catherine started the group that I belong to. We tend to just call ourselves the arty farty group. Catherine is an amazing artist, published in Quilting Arts no less! She is involved in a sketchbook challenge, which is always inspiring. Her sketches have a distinct style to them but not necessarily all the same, sometimes representational, sometimes stylised. I look forward to what she has to say about her process. You will find Catherine physically in rural New Zealand (the reason she no long runs our group) and on her blog here.

And I will leave you with a thingy that I'm making in the arty farty group. It may be a tea light cover.

Collage of paper on net viewed against glass
It's a rectangular vessel, sort of.


Wednesday, September 3, 2014

I love sequins!

I have a guilty little secret. I love sequins. I used to do ballroom dancing, just social not competition level. But I would have loved to have worn a Latin style backless dress covered in sequins! Sadly those days have gone but I still get satisfaction from sewing sequins on things.

My sister brings these kits over from Miami when she comes to visit. Look, I haven't even finished the first one and I've already started on the next. Story of my life!


Saturday, July 19, 2014

Forgotten treasure

Melanie is home from overseas and finding all sorts of forgotten treasure in her stored boxes.

I sent her this to put on the back of a world quilt she was making. Wouldn't this make a great block-of-the-month project?


And this weta was to remind her of home. I don't know why I thought that was a good thing to remind her about but it was the first bit of machine embroidery I had ever done. I had made stylised flowers before but never anything from a drawing or photo. The bobbin is there to give an idea of the size.

I've been in Australia for my holidays. Mum and I went over to Brisbane to see the Queensland Ballet perform Romeo and Juliet. Then Mum went home and I carried on up to Townsville to visit my good friend Issy. Then down to Sydney to see Becky (my other daughter), just in time for the Sydney Craft and Quilt Show. I met Mollie Sparkles and Lisa Walton, both lovely people but then aren't all quilters lovely!

I came back with airplane germs so no work has been done on my project this holidays and the weekend looks like it's filling up. Here's a bit of it anyway.


Sunday, June 8, 2014

No more new projects

I went to an interesting talk at the Auckland Quilt Guild yesterday. The speaker, Claire Inwood, makes dolls - one at a time. Did you hear that? She's a successful artist and makes one doll at a time. I'm sure there's a message in there.

So, no more messing around. I'm finishing some projects.

This is my "Keith" quilt. I've put all the strips together for my strip piecing (strip on the left) an d now I'm cutting them into thinner strips (on the right). I will reveal all in my next update.


Sunday, February 9, 2014

Floor cushions

You know when someone finds out that you sew and gives you a whole load of non-quilty stuff and you're not sure what to do with it. Well, at our guild we turn them into cushions.


This is a floor cushion (about 90cm x 90cm) made from all donated stuff apart from a bit of velcro.

We were given bags of what looks like offcuts from making mattresses. We also had this horrible batting that I've been trying to use up.
I wanted to line the inner cushion with the batting so that it wasn't quite so lumpy. I cut a strip of fabric and sandwiched the batting between the strip and the cushion inner so that I could sew the batting and make a pocket to put the off-cuts into.

The cushion inner is now lined with batting and filled with lumpy bits.

I made the back of the cushion from large curtain samples using velcro as a closure.

The front was made from upholstery and curtain sample books.

These lovely terracotta/pink fabrics were offcuts from a professional seamstress (sewer/sewist, which one do you use?) I was going to make myself some cushions or a handbag but I've had them for over a year and it hasn't happened yet. Time to let someone else appreciate them. These cushions are going to a children's home.


This is my latest project. It is really exciting. Two of these sheds are mine and are destined to become backpacker cabins somewhere lovely.
A couple of summers ago I visited Suz (http://suz-allthegoodonesaretaken.blogspot.co.nz) and Monika (http://monika-quiltingjourney.blogspot.co.nz). They live a beautiful part of the country up north. I also met Miss Lottie (http://theslightlymadquiltlady.blogspot.co.nz) on that trip. Miss Lottie often posts about the joys of living in the country. I made a decision that holiday that this was the life I wanted and I've been working my way slowly towards it. I'm planning to run a small backpackers and campsite (well, one electric point for an RV) and also build a house, keep chickens, grow stuff and do a bit maths tutoring.
The cabins are being built by students at my school. It will take them all year as they learn the skill for each part of the job. So I've got until the end of the year to find a place to put them.

Fiddler crabs

I had to take these photos with the flash so the colour isn't right. I've tried to adjust it so that you get a good idea of the ugliness of my challenge fabric. Pretty garish! But somehow I saw fiddler crabs in that fabric!

I just need to put a binding on it.

I'm particularly pleased with my little crabs in the distance. I just cut out random oval blobs for the first three and painted legs on them. Then when I went around them in black, they came to life. The very distant ones are just painted and then quilted with a dark grey thread instead. I like this scribble outline technique. It suits my messy way of working!

Friday, February 7, 2014

Painting backgrounds

I've been painting again. This time it's a background for a challenge quilt for our guild. I have a really ugly fabric to go on top of this but I think it will look great when it's finished.

The texture on the brown bit was done by adding rock salt to the wet paint. I used pink Himalayan salt, a bit extravagant but that's all I had. I've saved it for the next project!
I used Epsom salts on the light blue bit below. The darker bit I achieved by running a sponge brush with paint and no water over the wrinkled fabric. I let that dry and then added a wash of lighter blue over the top.  I wonder what a large piece would look like using that method, or adding a wash of a different colour.  Hmmm, more experiments needed.

Sunday, January 19, 2014

Experimenting with Sun Dyes

I had a play date with a couple of friends. We had all bought some Sun Dye paints from Lisa Walton so we had a day of experimenting.

Helen had a little bit of some thicker paint that I used to print leaves by painting onto the leaves and then pressing on to the fabric. Some worked better than others. Sun Dye is too liquid for this technique and perhaps I should have let it all dry before adding the wash over the top!

I loved this effect. This was the wipe up cloth after the one above, plus a little bit more colour to cover and then scattered with Epsom Salts and left in the sun.

This was just a doodle to see how much control I could have over the Sun Dye paint. Not a lot.

This was meant to be a sun print, the reason I bought the Sun Dye paint in the first place! I carefully arranged a load of different leaves on the painted fabric but nothing happened. Helen had the same problem. Then she said, "Do you think that doing it on a glass table is maybe not a good idea?" Duh! Then I had a double duh moment when I realised that I put the painted side down and put the leaves on the back of my fabric! Oh well, I'll just have to have another play.

I was very pleased with this sample though. This was another technique that I had been wanting to try, spraying paint through a stencil. The liquid nature of the Sun Dye paint seemed ideal for it. This is one of the Helen's stencils that she bought from Lisa. It's quite small so I had to be careful to only spray the middle to avoid getting a straight line from the edge but as you can see, the pattern seemed to merge into one cohesive whole. I also turned the stencil over and blotted off the excess paint onto the fabric so I've got positive and negative images. I only had one spray bottle and used three different colours but I think this would be easier if you had several bottles and could add more of any colour as you go. You also need to work quickly as the paint drys to a thin plastic film which clogs the nozzle. A great effect and well work the effort!

So I had another play. It was a lovely still day yesterday but I was too busy. Today was a little bit windy but very sunny. This time I lined the table with cardboard and a sheet of plastic and although I was worried that the fold in the cardboard might show through, the results were good.
 I painted this length in about three sections to try to get the leaves on to wet paint. Some of them stuck to the paint but I put pebbles on top just to be sure they didn't fly away.
 I scattered these little skinny leaves over when I had finished and the fabric felt dry already, I didn't think it would work but they look great. They give a real feeling of depth to the print, like little fishes swimming under the lily pads!


Wednesday, January 15, 2014

Thread bowl

Remember this?

It became a little bowl.

Made by placing several strands of embroidery cotton floss between two layers of water soluable stabiliser and free motion stitching over the whole thing. The top photo shows how little stitching I did to get this quite sturdy bowl. I think a little less embroidery floss and more stitching would be better. Then I took a polystyrene ball, chopped the bottom off it and covered it in plastic wrap. Washed out the stabiliser and shaped around the ball with a little bit of Mod Podge and left to dry.


It looks like the wigs my Mum made for a fancy dress party my brothers went to in the mid '60s. Guess who they went as? Hint, it was my two brothers and two friends. :)

I have ideas for this technique which I hope to fulfill in the holidays. Only two weeks to go...