I've made a couple of these handbags now, one for my sister and one for my sister-in-law. My other sister-in-law saw my sister's bag this holidays and now she wants one too - and I would quite like one! This bag was a commission for my sister's friend.
I've been playing around with my iPad and I made a little video tutorial with instruction on how to make this bag front.
And this is what is looks like after quilting.
Here's a tip, when lining the front flap, cut the lining an eighth of an inch to quarter of an inch smaller and then match the edges when you sew it up. The interfacing in the front is very rigid but the lining fabric is soft so making it smaller means that the lining turns under and doesn't show when you press it. You can see a sliver of the lining on the bottom edge of the flap in the photo above. I should have cut it a little smaller.
Each piece of the bag is cut out in denim and fusible interfacing. Then cotton batting is cut out an inch shorter in length and width and ironed under the interfacing to make half inch seam allowances on each side. All the cutting and fusing is time-consuming but it gives the bag more body.
The magnetic clasp only has a layer of lining between the contents of your bag and the metal prongs that hold it in place. I felt that could be a problem so I made this little bandage to go over the it. Usually I sew something over it but this time I decided to use this product that is designed to "glue" batting together. It's a web with a fusible side and it made a neat and quick bandage.
The clasp from the front
This was meant to be a photo of my next innovation, a rigid plastic base for the bag. I forgot to take a photo of it. Basically, the feet of the bag and like brads or paper fasteners I think we call them in UK. I've lived in New Zealand for 18 years now so I'm forgetting how to speak proper, like what I did in Scotland! That's a joke, folks!! I wonder what google translate will do with that.
But back to my feet, the prongs went through a plastic mesh designed for making bags and then fold down and hold it in place. It makes a great base and the bag stands up nicely.
Feet with plastic mesh. Looks like my other bags but is a big improvement.
Pocket for an iPad
Inside I made a pocket for a Kindle
So I'm going to make two more of these bags and that's it! No more. I've got too many quilts I want to make!!
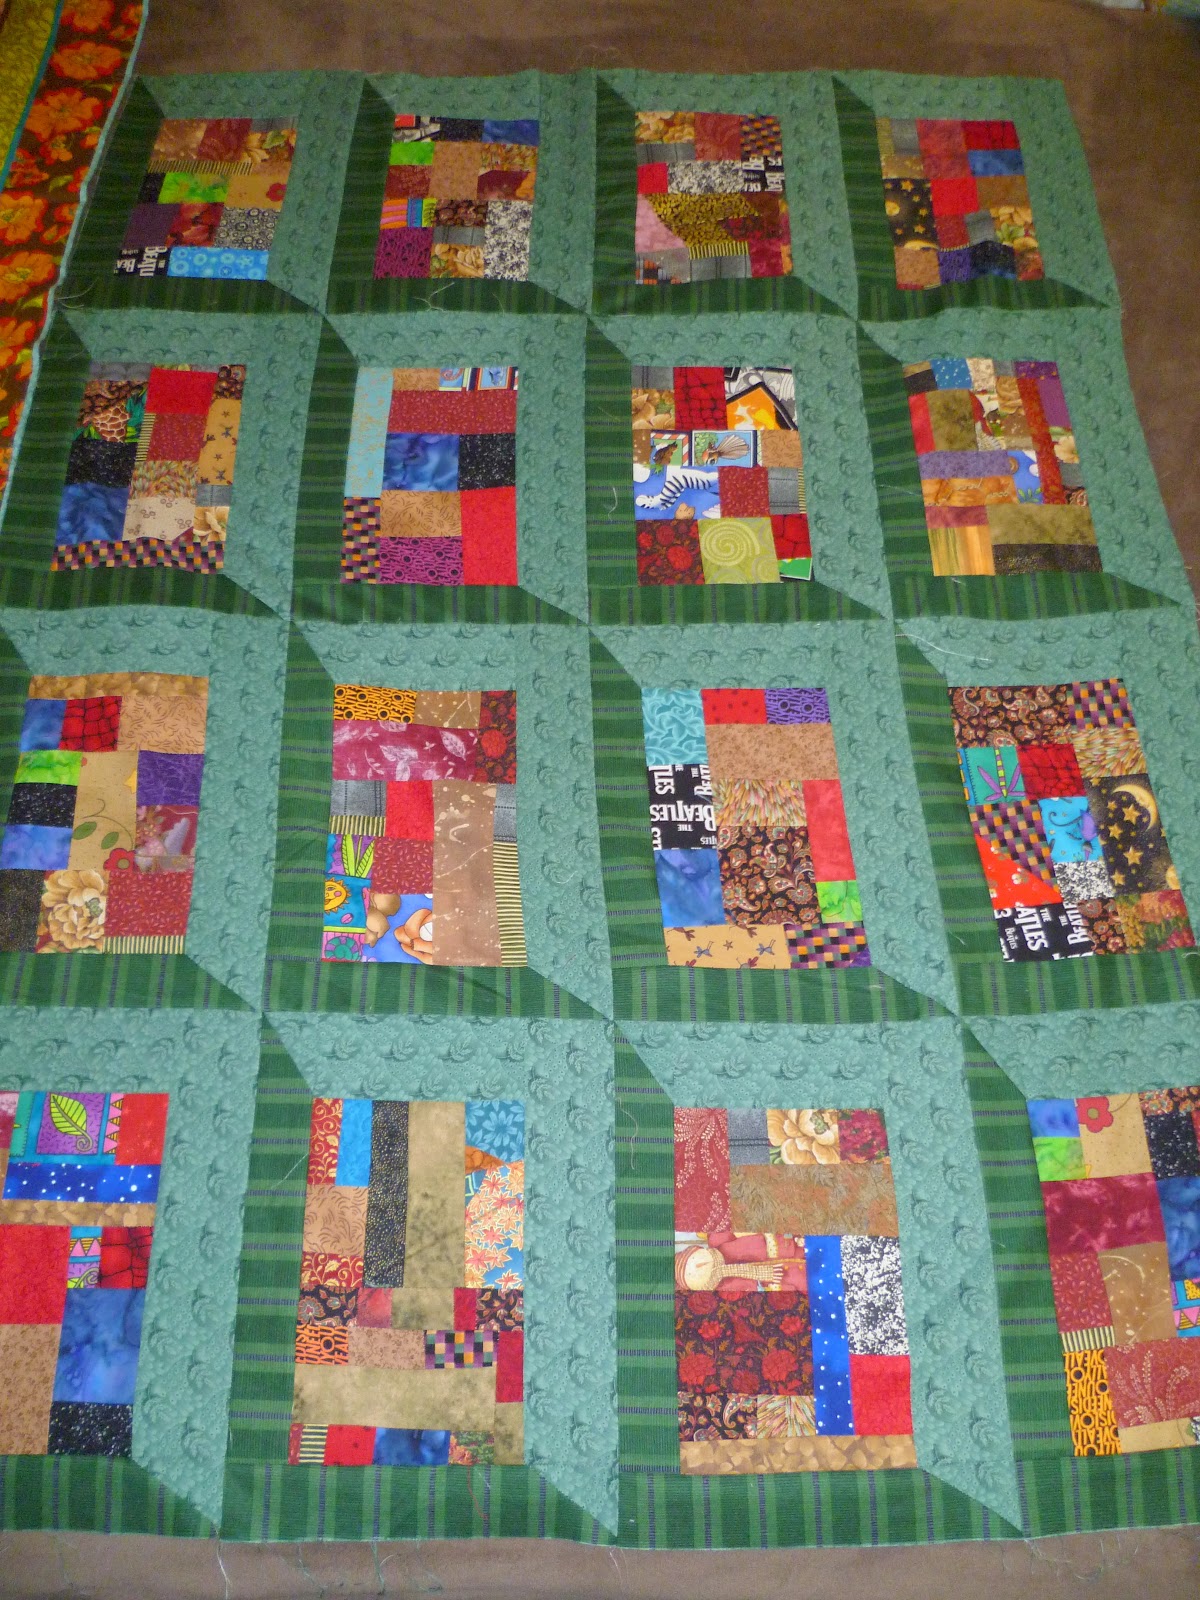
There were only five more blocks to make so Mum and I finished them off. Here they are after I chain-pieced the rows together.
I tried to trim the blocks as carefully as possible but I haven't fussed too much about matching seams on the applique. A lot of them are amazingly accurate but where it is a little out of alignment, like in the shorts leg above, I've just left it. I think it will add to the charm of this quilt.
Yet another project finished! Last weekend we had the woman from Dingwall Trust (care homes for children) come along to pick up some quilts. I really wanted to get this one finished and off my UFO list and I'm really happy to have one of my quilts go to Dingwall. The kids love them. It does your heart good to hear how our silly hobby of cutting up fabric and sewing it back together can comfort a child.
I arrived at the guild meeting 20 minutes before she came to pick up the quilts and I still had to stitch the binding down and sew a label on it! Two wonderful ladies helped me and we got it done just in time! Then Liz took this photo for me as I didn't have a photo of the quilting. As we were waiting for Liz to get her camera, I was chatting with the woman from Dingwall and I told her that I called this my stress relief quilt. I made this when I was a bit stressed at work and just needed to unwind by doing something that didn't require any thought. I wrote about how I made it here. http://layer-upon-layer.blogspot.co.nz/2011/02/my-stress-relief-quilt.html
She asked me who I thought it should go to. I said that I intended that it should be a quilt for a boy so maybe a little boy who is angry with the world. She said that they have just taken in a seven year-old who lost his mum and she thought that maybe it would suit him. Then I pointed out the quilting pattern that looks like lollipops is actually inspired by the movie Tron, where the characters go into the computer. 'Ah yes,' she says,'this will be perfect for him!' As I said, it does your heart good!
Here's a photo of the top before quilting. By the way, that quilting pattern is called Cyber Echo.
Well, first day of the school holidays and I've got lots of sewing to do - and lots of prep work for next year! I'm teaching a class next year using iPads. This will be a class of about 16 students that are very weak in maths, perhaps with learning difficulties, behavioural issues etc. They have been having a lot of success with these students in the intermediate school so we want to carry that on at secondary school. I'm looking forward to it but it's a lot of planning.
Then yesterday I found out that I'm going to be an ESOL teacher for one period of the week. Have I ever done that before? No, but I'm game for anything! The way our timetable works, if you teach two junior and three senior classes, you are one period under allocation so you have to pick up a lesson somewhere else. I've taken a reading class before (go to the library and read quietly - I can do that) and remedial maths tuition. The ESOL department want me to teach quilting instead. How exciting is that!! Imagine, the Ministry of Education are going to pay me to quilt! Well I hope they are going to pay me. I've gone from a fixed term contract to permanent staff so I had to fill in a new form for Novopay. My readers from New Zealand will have heard how the new payroll company has stuffed up pay for teachers. I haven't been affected - yet!
And I leave you with a photo of my daughter's name badge that she made for the guild she joined in Doha, Qatar. She seems to have abandoned her blog - after persuading me to write a blog! It's based on the traditional knife-through-the-heart tattoo. I can't say I've ever understood that image (maybe Melanie can explain) but I think her take on it is very amusing and I love it. That's my girl!!
Every year, towards the end of the school year, my school takes two days out to do things for the community. It's a chance to show the kids that community counts and that it is easy and very rewarding to do something for someone else. Projects range from teaching some elderly people to text, weeding (in school and our neighbours), cleaning up the beach, making jam for rest home residents, fundraising for the SPCA... and so on...
I offered to run a project making lap quilts for a local rest home. They specialise in dementia care and recently cared for one of the teacher's mother. They seemed like a fitting recipient of some quilts.
I was very fortunate to get a class of all adult students! I had a class of 15 ladies and two teacher helpers, some had some sewing experience but none of whom had ever used a rotary cutter. We had fun!
This is what we produced, one finished quilt, two that only need the binding on them, one to be quilted and bound and the fifth one I may save for next year. They are all based on the 3D bow-tie block. I've used this in a couple of quilts now and is one of my favourite hand-sewing projects.
Some happy workers!
Cutting and ironing station
The lady on the right (looking like a model!) was one of my main translators.
This may turn into a cot quilt for Middlemore Hospital or be saved for next year
I took this one home and had fun quilting it. Still to finish and bind.
Detail shot of the quilting
Our first finished quilt
I quilted a simple leaf design on this one.
They tried a different layout for the bowties and made an interesting secondary pattern.
We made a pieced back for this one and a student quilted it.
Straight line quilting done by one of the students.
All in all, I think it was a very successful project. I'm not sure how it would go with 14 to16 year-olds but I'm willing to try it again next year!
I made this mariner's compass using paper foundation piecing. I had used paper piecing before where you sew through the paper. I decided to try the method where you fold the paper back and stitch right next to the fold. The advantage of this method is that you can reuse the paper. The drawback is that you lose accuracy, especially on these really skinny points. Still, I got there in the end and I was pleased with the result.
Designing the mariner's compass was an interesting exercise. I thought I could do it mathematically but it didn't look right. Putting a perfectly proportioned compass inside a square looked wrong but fudging it a bit looked better. In the end, you just have to draw it!
After putting so much work into the middle, the other rows were very straightforward. I bought die-cut trees backed with fusible web. I just ironed them on and added some metallic thread for tinsel. My quilting is not great! I made this a few years ago before I bought my Supreme Slider. It makes a huge difference to your ability to make nice smooth quilting lines.
I also bought some die-cut stars and a couple of Christmas fat quarters from a bargain bin. I used the stripe fabric as my colour palette and found everything else in my stash. I love the challenge of using what you've got. Some of my best designs come out of trying to make do. You should have seen some of the clothes I made for my kids, hey Melanie!
Here's a collage of all the parts of this huge table runner.