Sunday, July 29, 2012

Modern quilting

This project ticks lots of boxes.

  • We did some stenciling and rubbing with crayons and paint sticks in my art quilt group. Homework is to do something with them.
  • I wanted to join in Leah Day's quilt along. (I may be too late but the intention was there!)
  • I wanted to explore some ideas on modern quilts for a class at the guild.
  • I bought a glass table for my new house and needed an everyday table cover. Putting things straight on to glass makes me nervous!
This was just an experiment with Shiva sticks, masking tape and rubbing plates but I liked it so much that I decided to make it the middle of my tablecloth.

Embracing the modern quilt movement - lots of white

I save net from flowers. It's fantastic for adding texture to your surface design.
I also used some net to make stencils. I cut out maple leaf shapes on some fusible web, left the paper backing on it and ironed it to the net. Stenciling through the net gave a lovely watery effect to the stencil.

A watery maple leaf 


All the left over bits were cut into wedge shapes and made into a great border.
So now I need to think about how to quilt it. Am I going to go for Leah's sampler style quilt or maybe feathers? An all over design or highlight the squares? White thread or contrast? So many decisions!!

Saturday, July 21, 2012

Black and White challenge

The main guild in Auckland had a challenge, 12" by 12", Black and White and One (other colour). My colour was purple.
I took the design from 'Circles of the East' by Kumiko Sudo. This one is Gentian, which I thought was very appropriate for a purple accent.

I didn't win anything. Some of the entries were fantastic and really deserved to win. I've got a new respect for the Twelve by Twelve group. It's not easy designing something so small and they get so much detail into a small quilt. One of the orange quilts is my favourite. What's yours?

I vary the stitch width to get sharp points and add interest to the line. 

I've moved again! This is my third move this year and hopefully my last for a while. I've got a sewing room now and this lovely view across my little garden and next door's garden too. Maybe I'll get time to do some sewing now. Calico Christmas/Festival of Quilts hand in date is coming up fast and I've only just started on my entry! 


Wednesday, July 4, 2012

A piece of nonsense

'A piece of nonsense'. That's what Jean from our Art Quilt group called the lovely things she creates. We loved them so she taught us how to do it. Would you believe that this mixed media postcard is actually a brown paper bag that held mushrooms and a used tea bag?

The brown paper bag was painted with black acrylic paint and then distressed and rubbed with metallic wax. Then I've layered the tea bag with Lutradur. I burnt the bit in the middle to get this random shape. A fun bit of nonsense!

Lattice bag

We made bags at Guild this weekend. This is my bag. Isn't it gorgeous!

Sunday, June 3, 2012

Mel's entry for the 'Best of British' competition

Melanie has done a drawing for the Derwent 'Best of British' competition. Not only has she created a stunning drawing but she has made a video of her doing it. Click here to have a look. 


I love all the things that she put into Scotland, things that are special memories for her. We really missed Tunnocks Tea Cakes and Irn Bru when we left. Funnily enough, now that you can get them here, I'm not so bothered! 

Please share the video on your social network. She wants to get it out to as many people as possible and then get lots of votes. Ta :-) (also I'm very proud of her and want everyone to see it!)

Monday, May 21, 2012

Bloggers' Quilt Festival

It's time for the Bloggers' Quilt Festival. So many quilts to look at and new quilters to follow - and possible new friends too. Click on the link above or the button at the bottom of this post for the festival.

My entry is the first painted quilt I did using LuAnn Kessi's technique. This is my nephew, my daughter and her husband. I love this little quilt!


Things I learnt while making this piece:
  • less is definitely more. Stop when you still think you have more to add and it will look just right.
  • Curls don't need to be painted. An impression of curly hair is enough
  • lips are only dark in the corners
  • in fact, the main thing I learnt was to really look at the photograph and see where to apply highlights and shadows
  • let your paint dry before adding the shadows. It makes it less muddy looking.
  • Blonde hair that has darkened to a fair brown is really difficult to replicate!
  • The flange border (the cream bit) makes a good frame but remember to allow for seam allowance and the depth of the flange when trimming the painting square.

This is the original photo after I had manipulated it in FastStone. It printed out a little lighter than this. I think I would have preferred it darker and I have tried darker prints since then with interesting results. They look a little freaky before painting!
I print on to a piece of fabric ironed to the back of an A4 sheet of freezer paper. My printer only goes up to A4 which limits the size. I have access to an A3 printer so I may do some bigger ones soon.

As you can see, I only really quilted the background and the border. I outlined the main shapes with coloured thread.


Have a look at the festival by clicking on the button below.

Amy's Creative Side

Sunday, May 13, 2012

Mother's Day

Happy Mother's Day to all the mums out there. I had breakfast in bed, crepes with chicken and mushroom and then one with lemon curd and chocolate. So I'm all set for the day!

It was lovely to relax and read my book. I'm reading Pam Holland's 'The 1776 Quilt'. Very appropriate for Mother's Day as Pam is the mother of 11 children and numerous foster children. Pam is an amazing person and I had the privilege of taking her class at the Auckland Symposium in 2005. Her 1776 quilt was exhibited at this event and it is just stunning. This is the quilt I made in that class.

My colours were very different to everyone else's in the class. They had all bought nice muted folk colours, cream backgrounds, very pretty. Mine was made with what I had to hand! I had just finished a year at university training for teaching and I was skint! I brought my whole stash in a small suitcase. Pam must have thought that she had a right nut case when I showed up!

Then since I'm an over-achiever, I was on to the satin stitch stage before everyone else. Pam's technique is to satin stitch around the raw edge applique after the quilt sandwich is made so it becomes part of the quilting too. I figured I already knew how to satin stitch so I just went for it. I was always taught (from books) that you stop with the needle in the outside of a curve at you turn through the curve. I've blown up this picture so you can see what a lousy job I made of that.

Pam says that on these tight curves with a small satin stitch that the build up of threads makes it ugly (I agree) and that stopping on inside makes a neater job. Ignore my quilting! I wasn't very good at it then. Also ignore the little bump on the top side of the branch. The point is that the end is much neater.

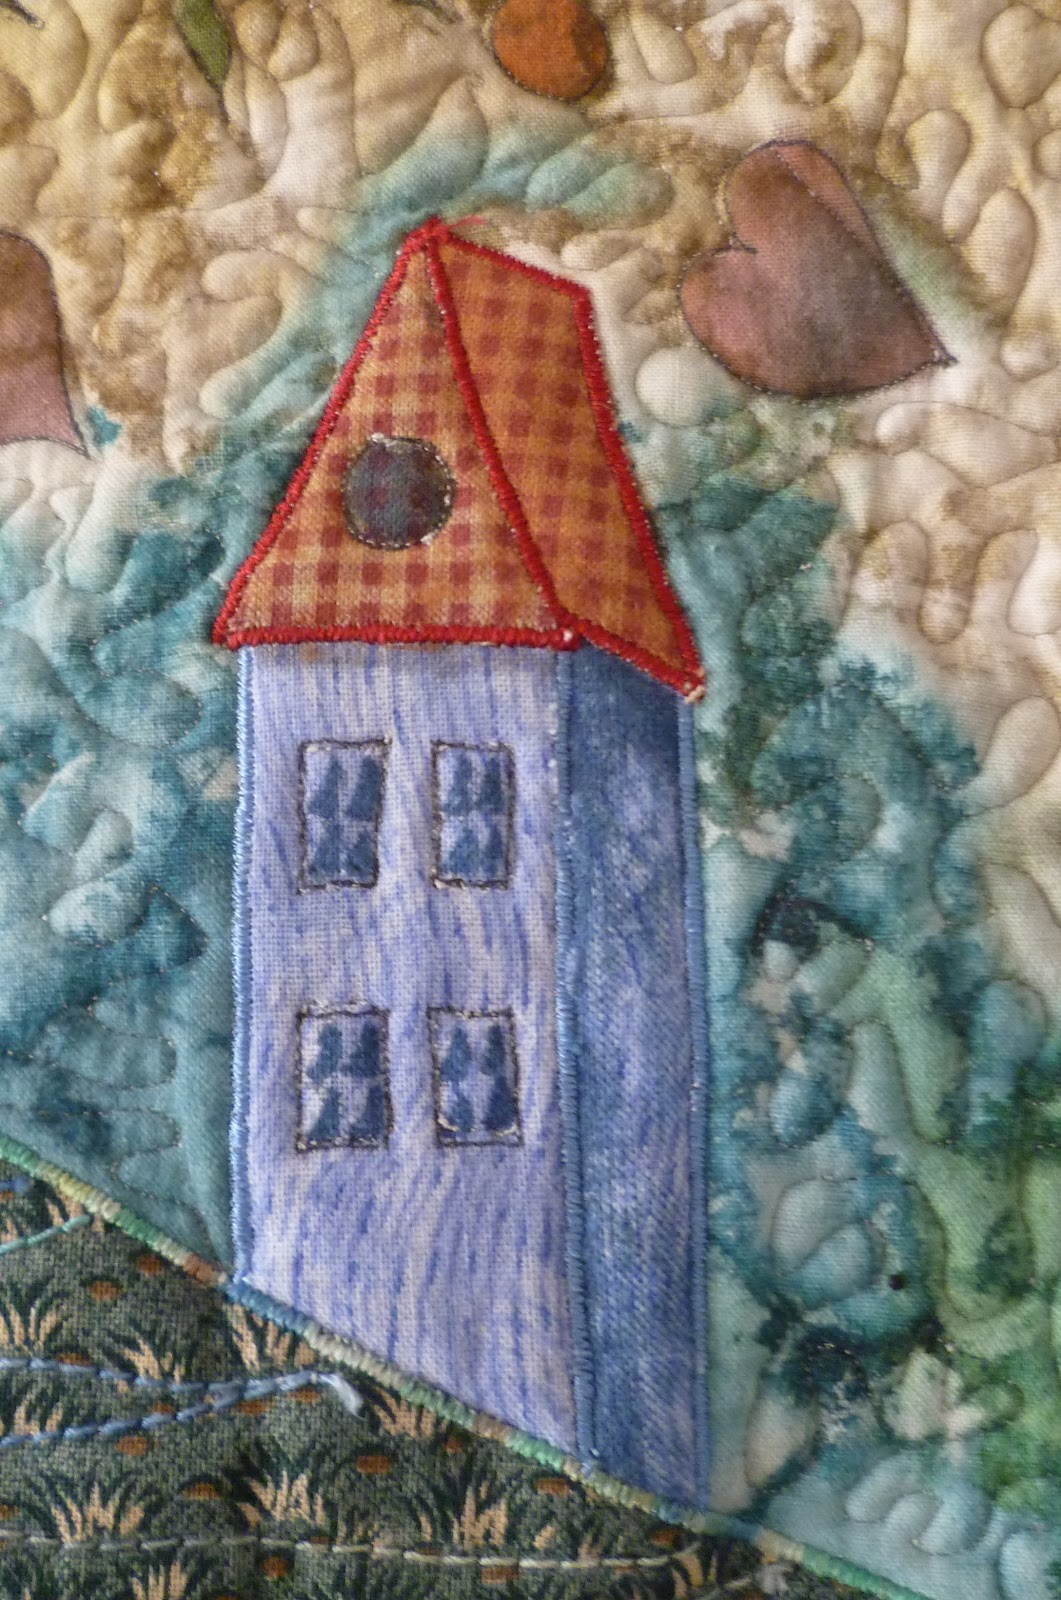
I liked her technique with the fabric pens too. You can add a lot of detail with a pigma micron pen and some fabric pens. This little house is two pieces of fabric, pigma pen and blue, gray and beige pen for the shading and windows.


I've used the techniques I learnt in this class is various quilts. This wallhanging was the next one I made after this class.